Managed Workstation Service (MWS) provides access to two network storage drives, the I: drive and the H: drive. The I: drive is departmental file storage and the H: drive is individual user file storage.
Note: H: drives are legacy drives that are no longer being established for new users. MWS encourages the use of Microsoft OneDrive for personal work file storage.
To access the I: and H: drives, make sure these four P’s are in order: Person, Permissions, Place, and PC.
Person: You must belong to an MWS-supported department
Access to shared drives is available only to departments supported by Managed Workstation (MWS). To connect successfully:
If you are unsure whether you meet these requirements, ask your supervisor or your department’s technical contact to verify your eligibility and, if necessary, add you to your department’s MWS Eligibility Group. MWS can also help determine what MWS Eligibility Group your department uses, but your department will need to add you to it via UW Groups.
Permissions: You need necessary permissions for access
I: drive folder access permissions are often controlled by group membership in specific UW Groups. If you have not been added to the necessary permissions groups, you may receive an “access denied” message when trying to view a file path on the I: drive.
The permissions groups you need can be determined by one of the following:
Your supervisor, who may know the necessary permission group(s)
Your departmental technical contact, who may know the necessary permission group(s)
Reviewing the UW Group membership of a coworker who already has access to the same I: drive file path
MWS, if the group(s) cannot be identified internally by your department
If you need MWS to determine which permissions group(s) control access, you will need to provide the full I: drive file path that you are trying to access.
Note: H: drive access is assigned to your individual NetID account. Membership in a specific permissions group is not required.
Place: Onsite or remote, you must be connected to the UW network
To connect successfully, you need to be on the UW network - either on campus or through VPN.
On campus: Connect using a UW Wi-Fi network or plug in to the network with an Ethernet cable.
Off campus: Connect to the internet and sign in to MWS VPN (if using an MWS PC) or Husky OnNet (for other Windows computers or Macs).
PC: How you access the drives depends on your computer
If you are using an MWS-supported Windows PC: Your I: and H: drives should automatically map via Group Policy when you log in to the computer. Open File Explorer and expand This PC to see the mapped drives.
If you are using a non-MWS Windows PC: You will need to manually map the I: and H: drives. See the Windows instructions below.
If you are using a Mac: You will need to manually map the I: and H: drives. See the macOS instructions below.
Drive Mapping Instructions
1.Open File Explorer and right-click on This PC in the navigation pane on the left hand side:
2. Click the drive letter from the drop down menu. You can only use letters that are not assigned to existing network drives:
5. After selecting the drive letter, enter the drive path shown below for the desired drive in the Folder field:
6. Check the box Reconnect at sign-in then click Finish for each drive you need to have mapped. The drives will now appear in File Explorer on the left side under This PC.
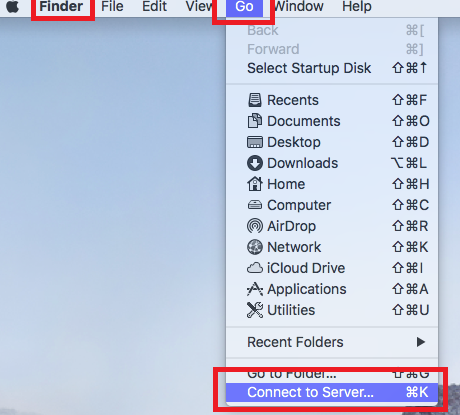
1. Launch Finder, click on Go in the menu bar, and then click on Connect to Server... to add a network drive:
2. Enter the drive path shown below for the desired drive in the address field and click Connect.
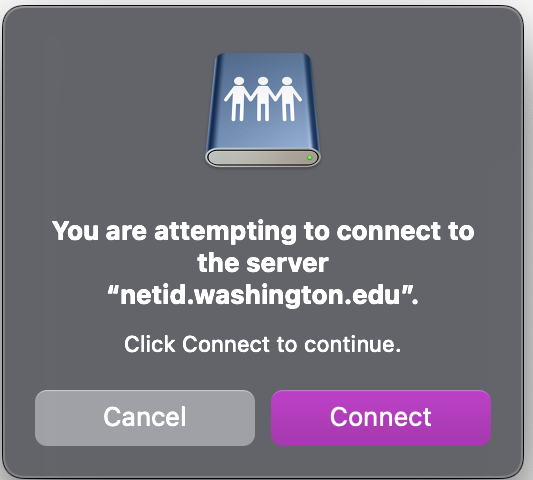
3. Depending on what version of macOS you are running, you may be prompted to connect to the server. Click Connect to proceed.
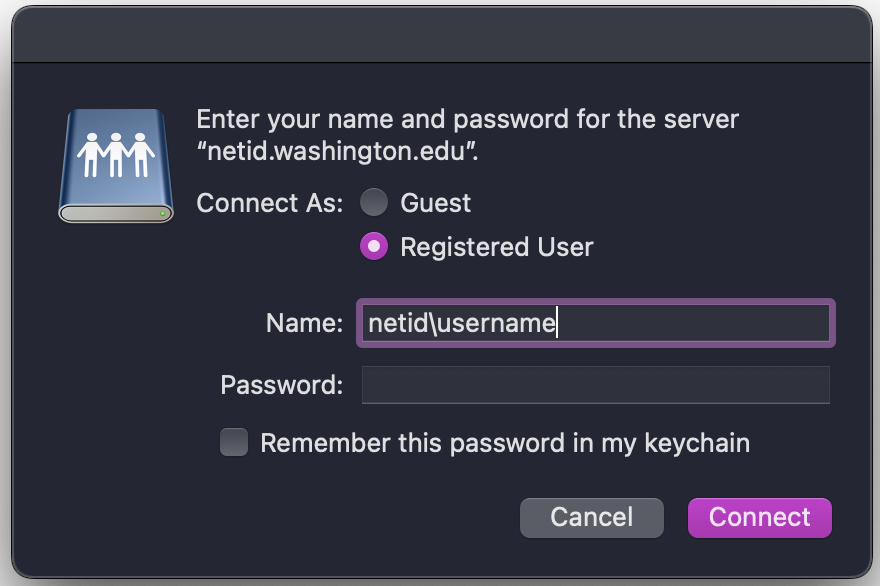
4. You will be prompted for credentials. For the name field, enter your UW NetID in the form netid\yournetidand then enter your NetID password. Click Connect.
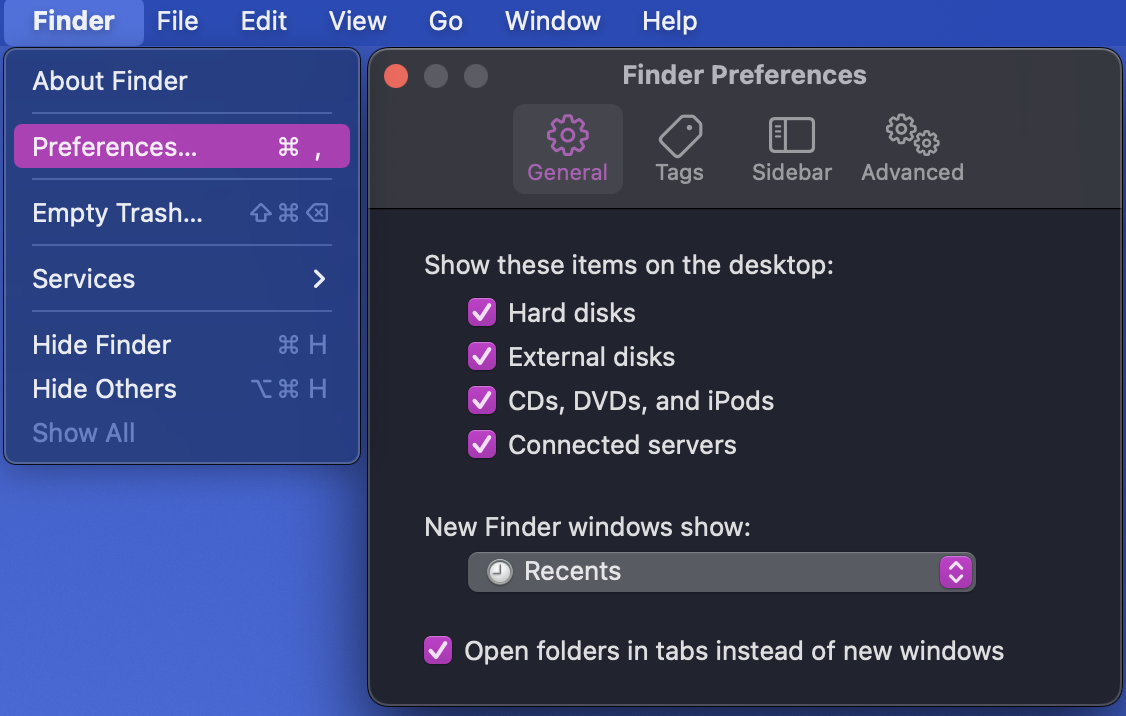
5. The drive will then connect. If the drive doesn't show up on your desktop, click on the desktop, go to Finder menu in the menu bar, select Settings, and ensure that "Connected servers" is checked under "Show these items on the desktop:". The mounted network drive will then display on your desktop.