Managed Workstation provides limited printer support
Managed Workstation Services (MWS) provides limited printer support confined to installing and configuring printers on Managed Workstations only. This includes a test print page to verify that the printer was installed correctly. If you are experiencing printer problems, MWS will do basic troubleshooting to determine if the problem is related to your workstation. If the printer is the cause or if you need printer support for repairs to your Ricoh printer, submit a request to UW Managed Print Services or send an e-mail to uwmps@uw.edu for assistance.
For non-Ricoh printers, UW-IT has historically had good working relationships with the following vendors:
- Xerox: Integrity Business Systems; 888-840-0844
- HP: CPR Computer and Printer Repair; www.cprnw.com/hewlettpackard.htm; 1-800-955-4075
- Printer Repair: Magnum Print Solutions, https://magnumlaser.com/service.php, 206-524-7715
Basic printer support can be found below as a no cost option.
Installing and uninstalling printers
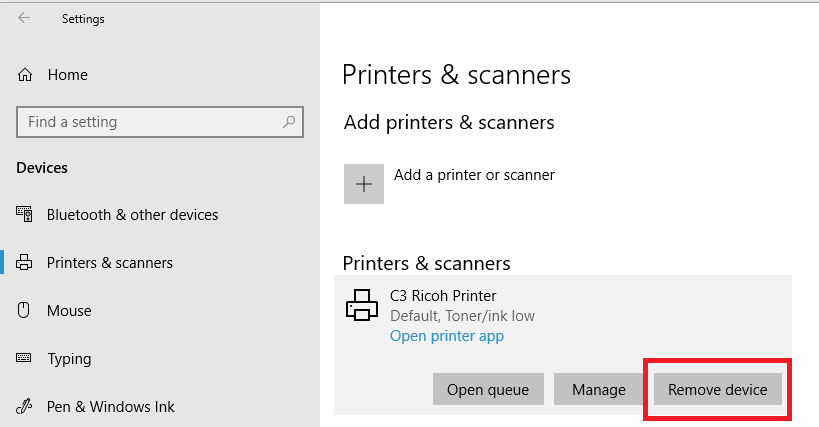
Start/Tile button - Settings (Gear icon) >> Devices >> Printers and scanners. Click on the target printer, then click the button "Remove Device"
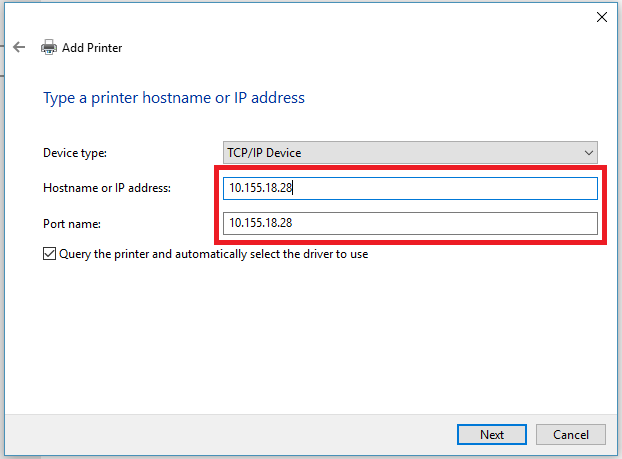
The first step in setting up a networked printer on your Managed Workstation is to find it's IP Address. Many printers have a label with their IP address on it. If there is no label, you can try printing a network setup report from the printer. If you're not comfortable with that, you can ask the person or team that installed your printer for the address. Once you have obtained the printer IP address, follow the instructions below.
 4. From the Device type field drop down menu, select "TCP/IP Device", type in printer name or IP address into the Hostname or IP address field. Leave the checkbox for "Query the printer and automatically select the driver to use" selected. then click "Next".
- Start/Tile button - Settings (Gear icon) >> Devices >> Printers and scanners.
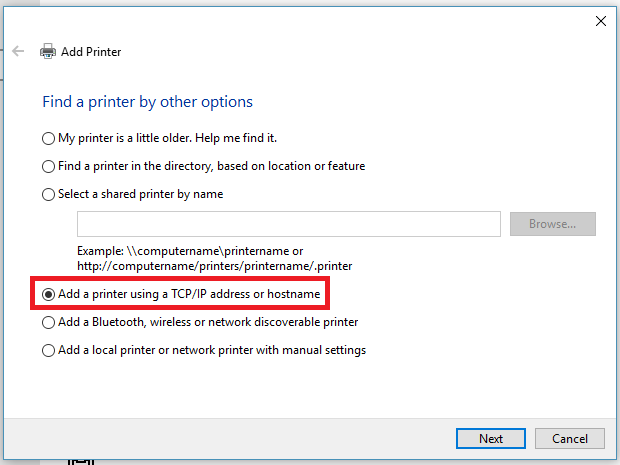
- Add a Printer (+) This function will scan for local printers you can install. If the printer you wish to install is on the list, click on the printer and it will install on your computer. If the printer is not on the list, go to the bottom of the list and click on "The printer that I want, isn't listed" A new pop-up Window will appear.
- Select the radio button named "Add a printer using a TCP/IP address or host name" then click "Next".
4. From the Device type field drop down menu, select "TCP/IP Device", type in printer name or IP address into the Hostname or IP address field. Leave the checkbox for "Query the printer and automatically select the driver to use" selected. then click "Next".
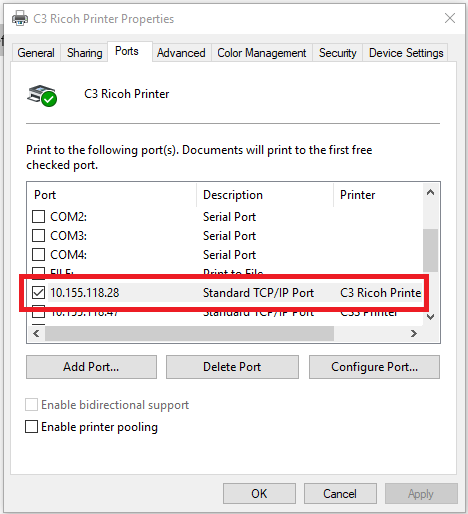
- If you are re-installing a printer using the same IP address, assign IP address in the Hostname or IP address field.
- The Hostname/IP address fields should match with the Port name.
These instructions will let you print a test page for most printers. 1. Start/Tile button - Settings (Gear icon) >> Devices >> Printers and scanners. Click on the target printer, then click the "Manage" button. 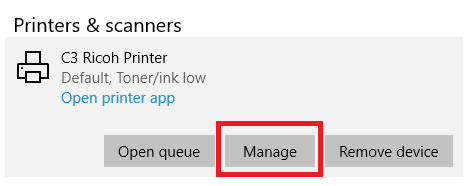 2. This will open a new window. Click on "Print a test page".
 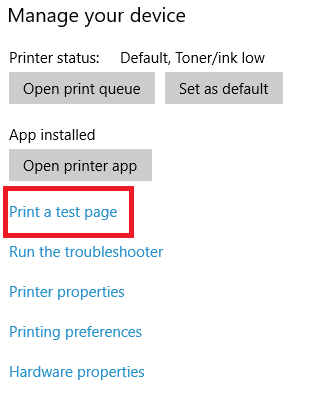 A test page will be sent to the printer
2. This will open a new window. Click on "Print a test page". A test page will be sent to the printer Getting the name of the printer A printer can have up to three names:
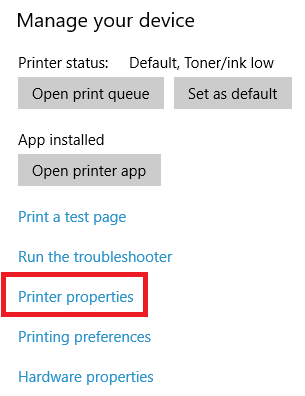 2. A new Printer properties window will open. The printer name appears on the "General" tab.
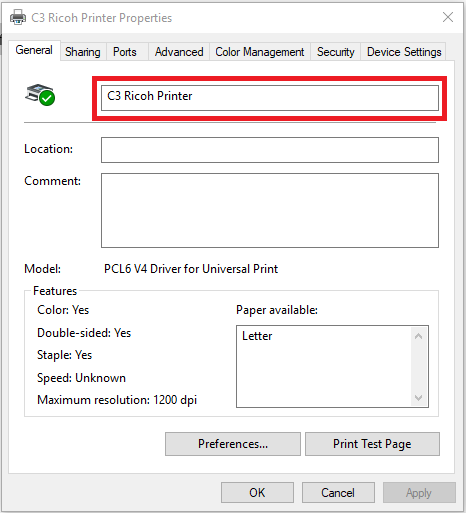
- The name by which it can be found on the network;
- The IP address assigned to it;
- A nickname assigned to it by its owner.
2. A new Printer properties window will open. The printer name appears on the "General" tab.
Basic printer troubleshooting tips
-
- If it's not printing, or you're getting a message about the Fax printer, change your default printer: Start - Settings - Printers/Faxes. Right-click the printer you want, and then select (left-click) Set as Default.
- Check and make sure all connections going to and coming from the printer are firmly in place.
- Check that the printer is on-line:
- Start - Settings - Printers, right-click the printer.
- If there isn't a checkmark by "Set as Default", left-click that option to select it.
- Using the control panel on the printer or the printer management program, print a test page. If the test page prints and the application you are using doesn't, you probably will need to contact the application's vendor for support.
- Turn off your printer for 10 seconds and turn it back on. Make a note of any error messages or flashing lights when the printer is turned back on.
- If your printer is connected directly to another computer, try rebooting that computer. If your printer is connected to a JetDirect box, try unplugging the JetDirect box for 10 seconds.
- As a last resort, you can try uninstalling and then re-installing your printer.