You need to have administrator privileges on the computer you wish to connect to remotely. If you are unsure if you are an administrator on your machine, follow these steps to check:
Checking if You Have Administrator Privileges
- Open Settings by using the Windows Key + I keyboard shortcut OR right-click on the Start Button and select Settings
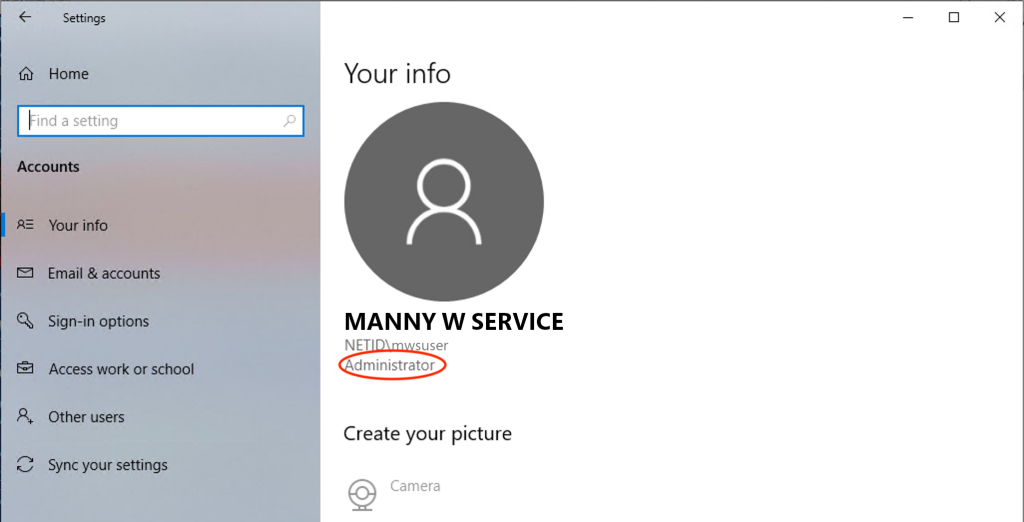
- In Settings, click on Accounts in the left side list > click on Your info on the right section
- If you are an administrator on the computer, you will see the word "Administrator" under your NetID username. If you do not see the word "Administrator", you're not an administrator and should send a request to help@uw.edu, along with your computer name, to request that you be added.
Make sure that the computer you wish to connect to remotely is not set to automatically go to sleep. To do so, follow these steps:
Checking Your Power Settings
- Open Settings by using the Windows Key + I keyboard shortcut OR right-click on the Start Button and select Settings
- In Settings, click on System in the left side list > click on Power & battery on the right section
- Click on Screen, sleep, & hibernate timeouts to expand that section
- Under "Plugged in" set the "Make my device sleep after" setting to Never
- When you leave for the day, make sure to leave your computer powered on.
To be able to connect to your Managed Workstation computer with Remote Desktop, you need to know the fully qualified name of the computer.
Finding the Computer Name
- Open Settings by using the Windows Key + I keyboard shortcut OR right-click on the Start Button and select Settings
- In Settings, click on System in the left side list > click on Remote Desktop on the right section
- In the "PC name" section you will see your computer name in this format: computername.clients.uw.edu
- Make a note of this name, you'll use it when connecting to your machine later.
On the local computer you are remoting
FROM, you will need to use a VPN connection. There are 2 VPN options available to you:
More information about how to setup and connect using those services can be found by clicking the links above.
Once you have established a VPN connection on your local computer, follow these instructions below on how to initiate a Remote Desktop session to your remote computer. To open the Remote Desktop Connection application on the Windows computer you are connecting
FROM:
-
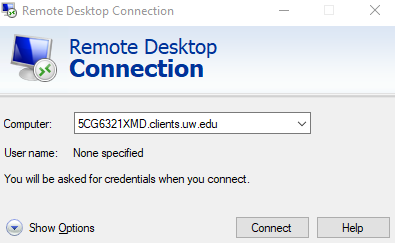
Click on the Start button and type "Remote Desktop Connection". Click Remote Desktop Connection in the search results. The Remote Desktop Connection application window will display.
-
In the Computer: box, type the name of the computer that you want to connect TO, and then click Connect. The computer should appear as: computername.clients.uw.edu
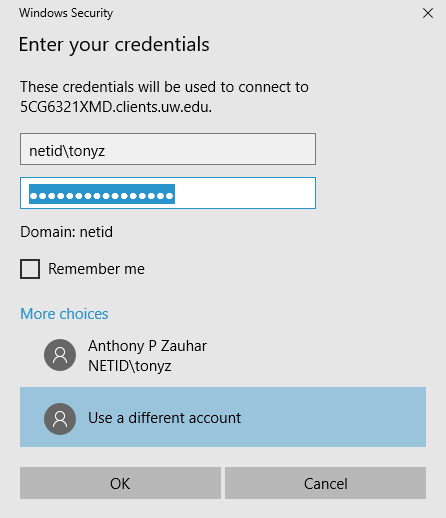
- Enter your UW NetID credentials:
-
- Username: netid\yournetid
- Password: Your NetID password
Remote desktop software is available for other operating systems:
Using the Microsoft Windows App for Mac
To establish a Remote Desktop session, use the following steps:
- Open the Microsoft Windows App
- Click the + icon in the upper right-hand corner of the window to create a new connection. Select Add PC from pop-out menu.
- PC Name: yourcomputername.clients.uw.edu
- Credentials: Ask when required
- Friendly name: Optional - add if you would like to use a personalized name for the PC connection (ex: Work Computer)
- Group: Use the default "Saved PCs"
- Gateway: No gateway
- There are four sections with settings you can adjust to personal preference: General, Display, Devices & Audio, and Folders. Optional recommended settings:
- General:
Check box for Reconnect if the connection is dropped
- Display:
Resolution: Default for this display
Check box for Start session in full screen
Color quality: Medium (16 bit) or High (32 bit)
- Devices & Audio:
Check box to redirect printers
Uncheck box redirect Smart cards
Play sound: On this computer
- Click the Add button to add the new computer connection.

To Start a Remote Desktop Connection:
- Locate the new PC connection you created - it will display as a tile on the main screen under Saved Devices
- Click on the PC connection to select it and then click on the ... icon (or right-click on the PC connection tile)
- Click on Connect
- Enter your credentials:
- Username: netid\yournetid
- Password: Your NetID password
- Click Continue
- If you should see the certificate warning below, click Continue.
Note: You can permanently remember the certificate by clicking Show Certificate, expanding the Trust section, and selecting "Always trust" and clicking Continue.


